No-Bake Christmas Truffles: Your Perfect Holiday Treat
If you’re in search of something easy, festive and delicious treat that will impress your friends and family this Christmas season, these Christmas truffles that don’t require baking are precisely the thing you’re looking for. They’re not just easy to make, they don’t even require baking. They make the perfect choice to the hectic holiday times where time is limited and expectations are high.
They offer the most desirable of both: delicious flavor and gorgeous appearance. With a rich, melting-in-your-mouth texture, they appear and taste as if they were created by professional chocolatiers. You can also alter the flavors as well as coatings and decorations to your liking or to match the theme of your holiday. When you’re making them for a celebration or gifting them to friends or simply eating them in your home the easy-to-bake truffles will soon become a popular treat.
In this tutorial I’ll teach you how to make perfect, no-bake Christmas truffles and share some creative ideas and offer expert advice to ensure success every time. In the process I’ll also address frequently asked questions and provide suggestions on how to serve and present these tasty desserts.
Why You’ll Love These No-Bake Christmas Truffles
Before we get into the recipe we’ll take a moment to understand why this baked truffles are a beloved holiday treat:
- Easy to make Because there is no baking involved The process is easy and hassle-free.
- Customizable Mix and combine flavors, coatings and even decorations to create endless possibilities.
- Perfect for gifting These truffles are stunning when placed in attractive mason jars and tins or boxes that are decorated with festive colors, making them ideal to give as gifts for the holidays.
- Kid-friendly The process of rolling and decorating truffles is a great task for children to get involved with.
- Crowd-Pleasing with their rich taste and festive appearance They’re a huge popular choice for parties and gatherings.
If you’re looking to find more ways to give personal touches to your Christmas gifts look no further than these innovative homemade food gifts ideas.

Ingredients for No-Bake Christmas Truffles
For starting out you’ll require some essential items:
For the Truffle Base:
- 2 cups crushed cookies (such as Oreos, gingerbread cookies and shortbread biscuits)
- 6 ounces cream cheese, softened
- 1 tablespoon vanilla extract (optional for flavor enhancement)
For the Coating and Decoration:
- 8 pounds Dark chocolate or milk chocolate that has been melt
- Sprinkles of Christmas, crushed candy canes and color-coated sugar for decorations
- Cocoa powder or powdered sugar to create a dusty finish
size=0 width=”100%” align=center>
Step-by-Step Instructions to Make No-Bake Christmas Truffles
By following these easy steps, you’ll be able to have stunning, non-bake Christmas truffles prepared in a matter of minutes:
1: Prepare the Cookie Mixture
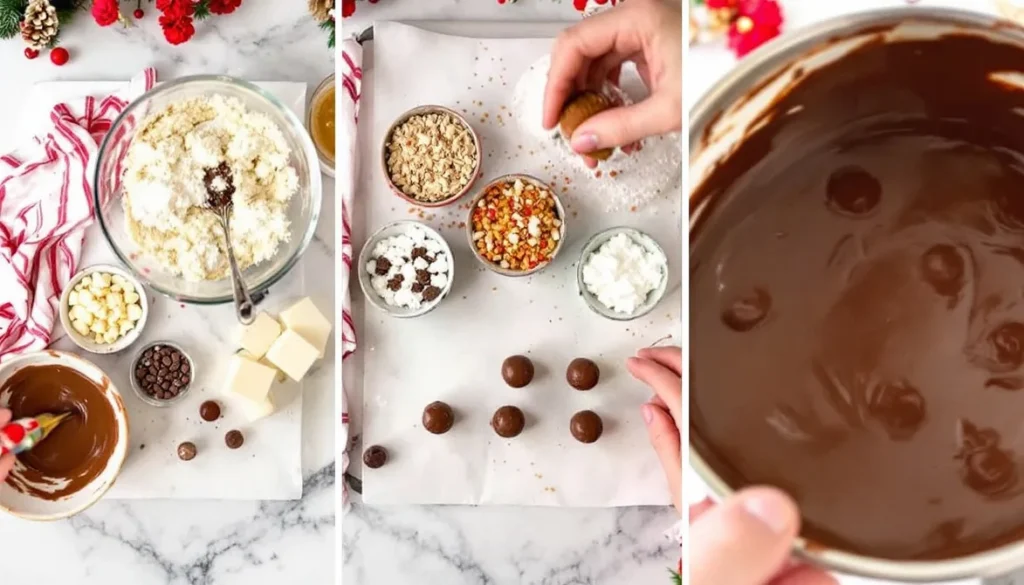
- Start by breaking the cookies until they are fine pieces. To get the most effective results, use a food processor for a uniform, smooth texture. If you don’t own a food processor, put the cookies into a resealable bag and crush them using the help of a rolling pin.
- In a large mixing bowl mix the cookie crumbs and in a large mixing bowl, combine the crumbs of cookies with creamy cheese that has been softened. Mix until you achieve an even, dough-like consistency.
- In this stage you can make use of vanilla extract or any flavoring you prefer to improve the taste.
size=0 width=”100%” align=center>
2: Shape the Truffles
- Make use of a teaspoon or a small cookie scoop to divide the mix. Then, roll each portion into balls of even size with your fingers.
- If the mix feels too sticky, you can chill it in the fridge for a few minutes before rolling.
- The truffles should be placed on a baking sheet lined with parchment to prevent their from getting stuck.
size=0 width=”100%” align=center>
3: Chill the Truffles
- After that, cool the truffles for a minimum of 1 hour. They will hold their shape after coating the chocolate.
size=0 width=”100%” align=center>
4: Coat the Truffles in Chocolate
- Make chocolate white chocolate, milk chocolate as well as dark chocolate in the microwave, stirring it every 15 to 20 seconds to avoid burning. Alternately, you can utilize a double boiler for greater control over melting.
- Dip each truffle in the chocolate that is melting by using a fork or skewer. Let the excess chocolate run off prior to placing the truffles that have been coated back onto your parchment.
For helpful tips to melt chocolate with precision, refer to this article for melting chocolate without causing any seizing.
5: Decorate the Truffles
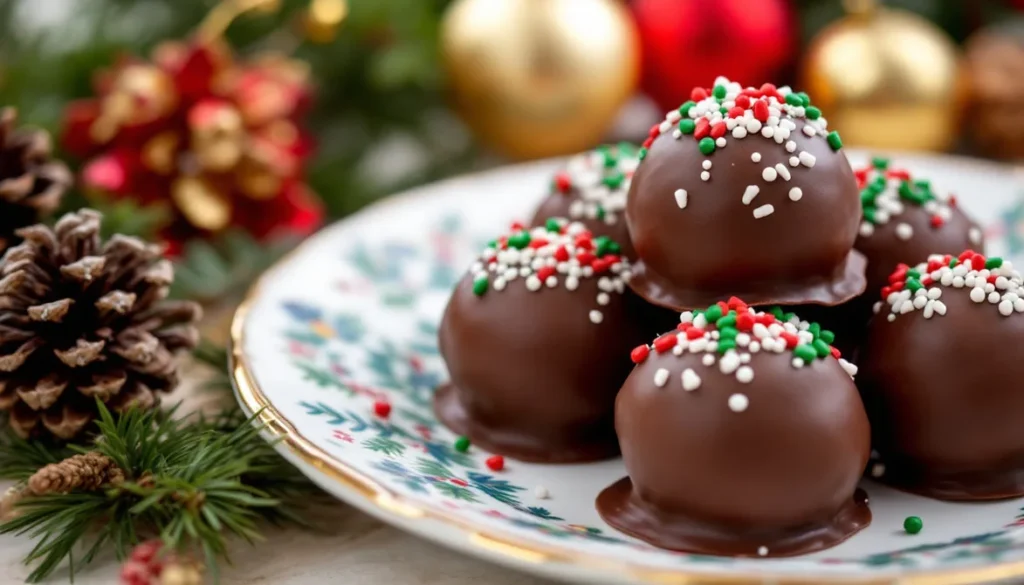
- When the chocolate coating remains wet Decorate the truffles by using festive sprinkles, crushed candy canes and color-coated sugar.
- If you prefer a more traditional style you can dust your truffles in cacao powder or powdered sugar after the chocolate has set.
size=0 width=”100%” align=center>
6: Chill and Serve
- After that, chill the truffles that have been decorated for an additional 30 minutes, allowing the chocolate to set fully.
- When they are firm Once they have cooled, you can serve them on a beautiful platter or gift them to someone else.
size=0 width=”100%” align=center>
Creative Flavor Variations for No-Bake Truffles
One of the most appealing aspects regarding these truffles how simple to make them custom. Here are some creative options to experiment with:
- Peppermint Chocolate Truffles
- Include a few drops of the extract of peppermint into the base of truffles. Roll the truffle in the candy pieces to give it a festive peppermint twist.
- Gingerbread Spice Truffles
- Make use of gingerbread cookie as the base, then cover the cookies with white chocolate. Sprinkle on a bit of cinnamon to add a touch of warmth.
- Coconut Dark Chocolate Truffles
- Mix the shredded coconut into the mixture of cookies and then roll the truffles with coconut flakes.
- Nutty Christmas Truffles
- Finely chop walnuts or pecans to the base, then drizzle with melted dark chocolate. Sprinkle the extra nuts on the top.
- Vegan-Friendly Truffles
- Make use of the vegan version of cream cheese and dairy-free chocolate to make an alternative that is plant-based.

Tips for Perfect No-Bake Christmas Truffles
To ensure that your truffles are perfect each time, follow these useful tips:
- Chill Prior to Coating Chilling the truffles can help to keep their shape when they are dipped in chocolate.
- Utilize High-Quality Chocolate To get the smoothest and most rich coating, select the highest quality chocolate.
- Decorate Fastly Make toppings after the truffles have been dipped to ensure they are firmly attached before the chocolate sets.
- Store properly The truffles should be kept inside an airtight jar in the fridge for up to a week or store them in a freezer for up to 3 months.
How to Serve and Gift No-Bake Christmas Truffles
They are not just tasty, but also beautiful Christmas gifts and decorations:
- Serve them on an Holiday Dessert Platter: Serve them alongside brownies, cookies and other sweets for an exquisite dessert buffet.
- Packaging as Gifts The truffles can be placed in attractive tins, mason jars, or boxes decorated with parchment. Include ribbons and notes with personalization for a thoughtful and personal present.
- Christmas Favors for the Party: Place each truffle inside a cupcake liner that is small for a stylish and easy serving choice.
For additional gifting options You can mix these truffles up with this festive pumpkin Banana Loaf for a complete Christmas treat package.
FAQs About No-Bake Christmas Truffles
1. Do I have to make truffles ahead of time?
Yes, you can make truffles up to 3 days in advance and then store these in a refrigerator.
2. Can I freeze these truffles?
Absolutely. Put them in a container that is freezer-safe and freeze three months or more. Then, chill them in the refrigerator prior to serving.
3. What kind of cookies work best for the base?
Oreo biscuits, gingerbread Graham crackers, or shortbread biscuits work well together.
4. What can I do to fix the chocolaty clumps?
Slowly melt the chocolate, and If it starts to swell then add a teaspoon coconut oil to smooth it.
Conclusion It’s the Perfect Holiday Treat with No-Bake Truffles for Christmas Truffles
Embrace the Simplicity of No-Bake Christmas Truffles
As the Christmas season is near it’s crucial to discover recipes that are easy to make and delicious. Truffles that don’t require baking are ideal to make this happen. These tiny bites are easy to prepare and packed with Christmas flavor. With just a handful of ingredients you’ll be able to make various truffles that everybody will enjoy. If you’re hosting a Christmas party, searching for gifts, or simply need a sweet treat these truffles that don’t require baking is the best way to go.
Customizable and Versatile
One of the most appealing aspects about the no-bake Christmas truffles is that they’re easy to modify. You can alter the flavor to suit your preferences. From vanilla to chocolate or gingerbread to peppermint the options are infinite. You can also decorate your truffles with sprinkles, crushed nuts or melted chocolate to make them appear more festive. Whatever flavor you select it is a guarantee that they will be a huge hit.
Perfect for Gifting and Sharing
Truffles made of no-bake Christmas can be wonderful presents. Making these sweets can be an enjoyable activity for friends or family. The result, beautifully packaged truffles, makes an ideal present. When wrapped in beautiful containers, mason jars or cellophane, they’re sure to be loved. These treats made from scratch have the personal touch that retail presents can’t be compared to. It’s also easy to make large quantities, making it possible to give them to a large group of people.
A Stress-Free Holiday Treat
The season of Christmas can be stressful due to all the preparation, shopping and cooking. No-bake Christmas truffles can take the stress out of baking. They’re simple to prepare, using only a few ingredients. As opposed to baked items, you don’t have to fret about the temperature of your oven or time. These truffles are the ideal solution for those looking to make an easy treat that doesn’t require long hours at the stove.
Lasting Impressions from No-Bake Christmas Truffles
The Christmas truffles made without baking leave lasting impressions. The rich texture and festive flavor give each bite a unique flavor. It doesn’t matter if it’s chocolate rich and refreshing peppermint and warm gingerbread. These truffles delight any palate. The greatest thing is how easy they are to prepare. In just a few simple steps, you’ll be able to make an assortment of truffles that taste and look amazing. They’ll surely delight those who visit or receives them.
Celebrate the Holiday Season with No-Bake Truffles for Christmas!
This Christmas season, don’t be stressed about complex recipes. You can make easy, delicious, no-bake Christmas truffles. These sweets are a wonderful method to share Christmas joy with your loved ones and family. If you’re enjoying these at home, presenting them to friends, or taking them to a celebration They’re always a hit with guests. The most appealing aspect? You can alter the flavor to fit your personal taste. So, you can have a wonderful holiday with these delicious, easy truffles.

